


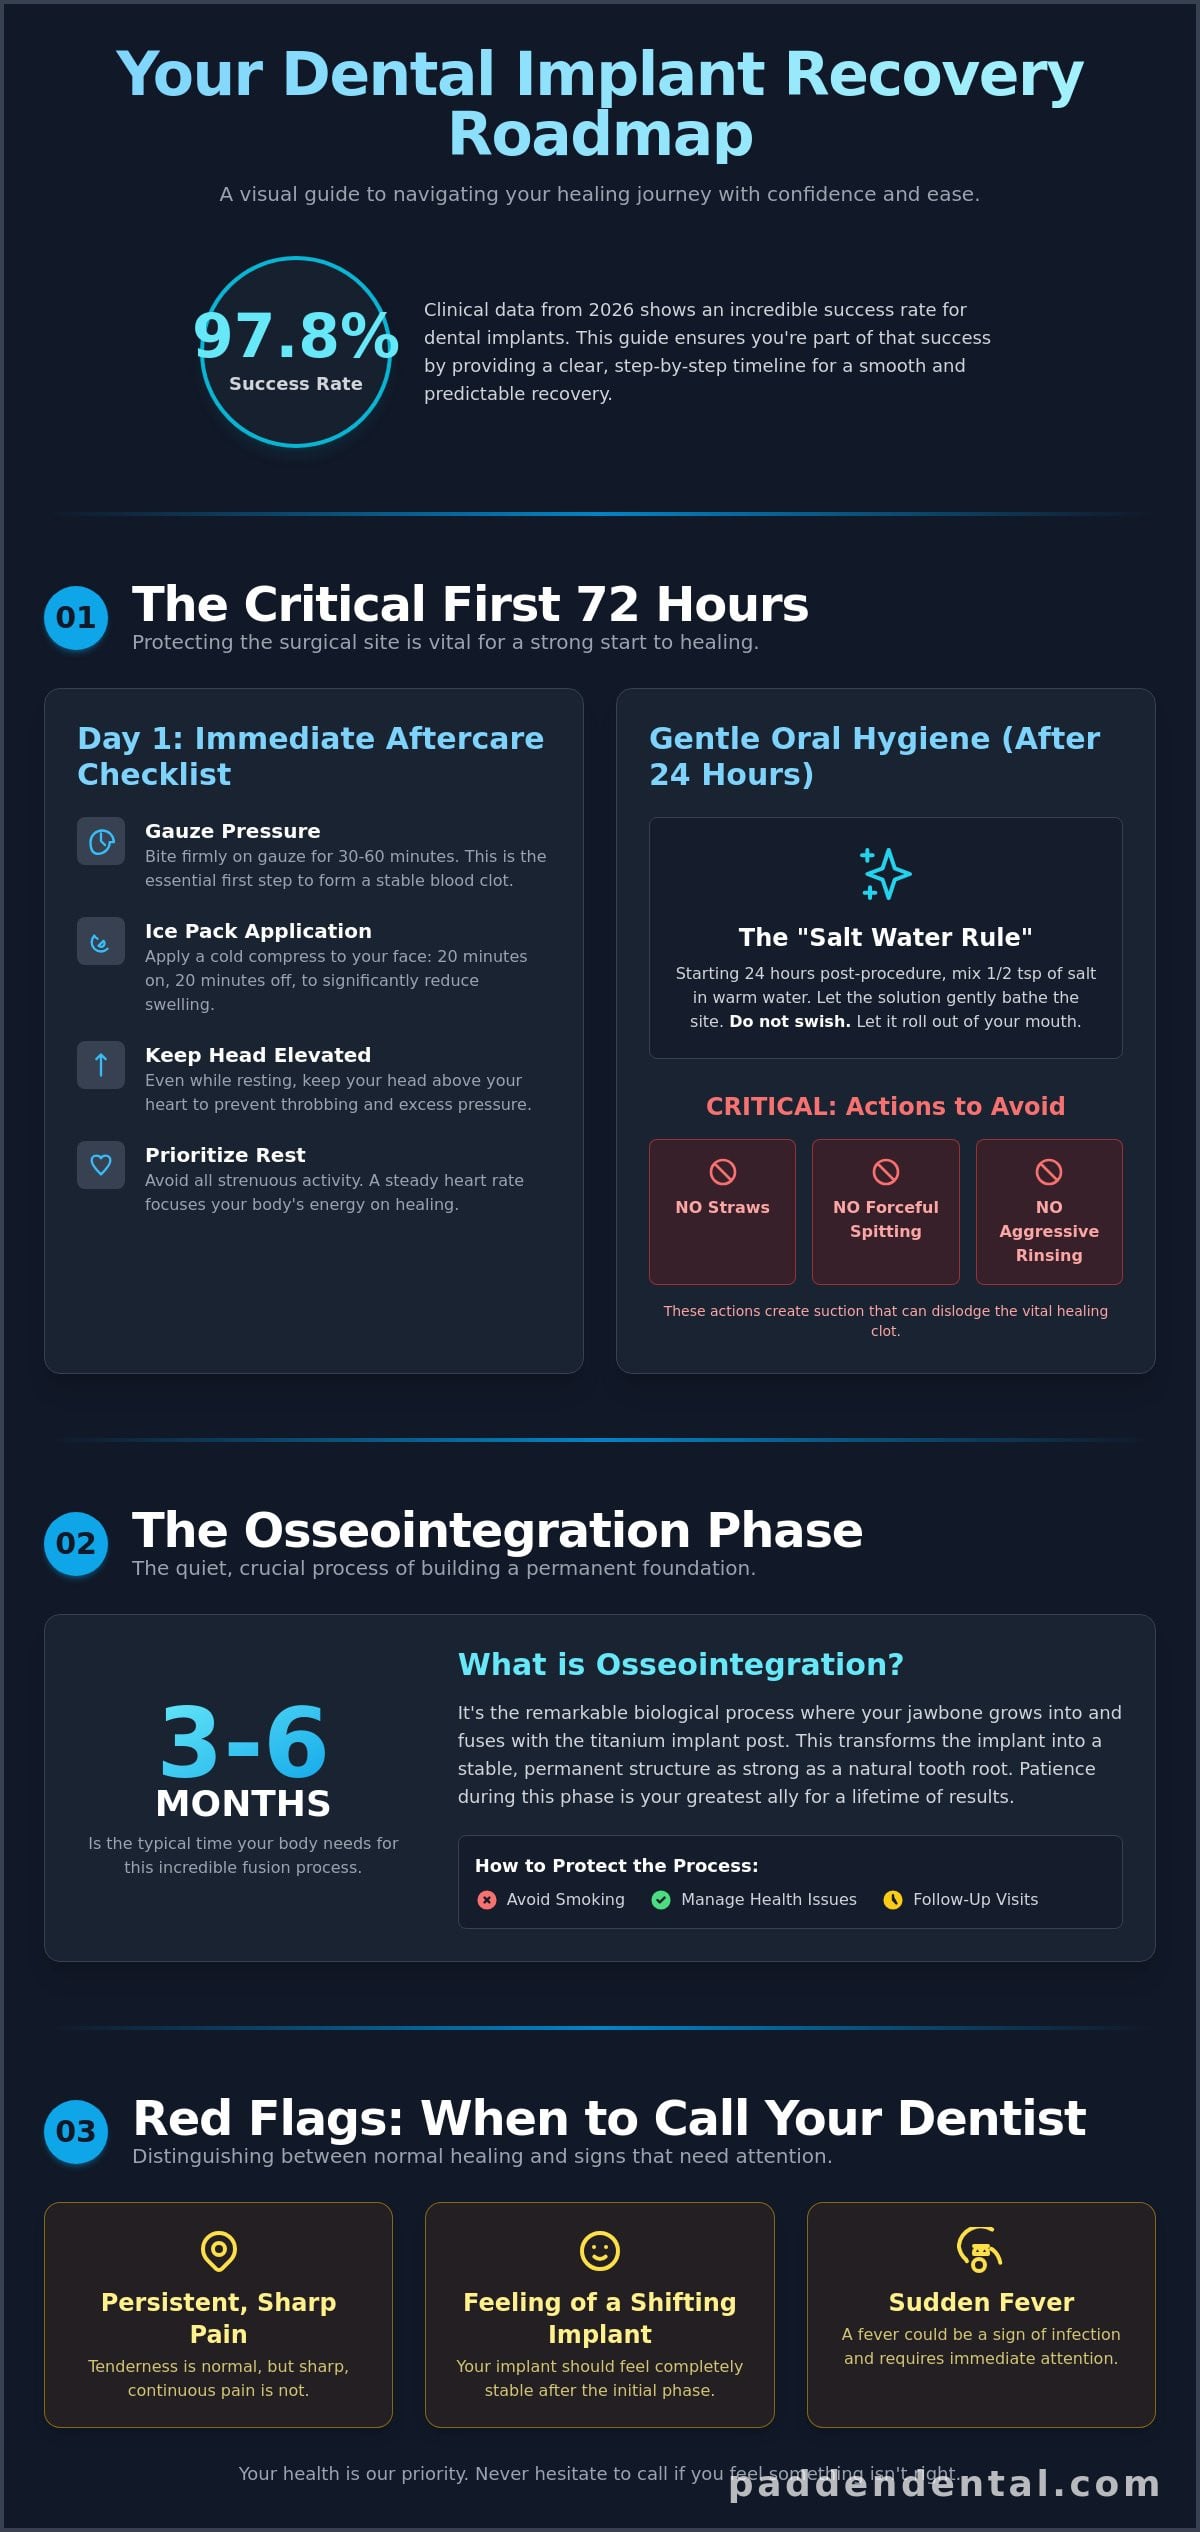
Did you know that 2026 clinical data shows dental implants now boast a success rate of 97.83%? While that number is incredibly reassuring, it’s completely natural to feel a few “procedure day” jitters. You might be worried about how much time you’ll need to take off work or whether a specific sensation is a normal part of the dental implant recovery process. We understand that the journey to a restored smile feels like a big step, and you want to ensure every stage of your healing goes exactly as planned.
You deserve to feel confident and relaxed as you reclaim your health. This guide is designed to replace your uncertainty with a clear, day-by-day roadmap of what to expect during your journey. We’ll walk you through the first 24 hours of aftercare, explain how to manage comfort at home, and help you distinguish between healthy progress and moments when you should reach out to your dental team. By the time you finish reading, you’ll have the knowledge you need to navigate your recovery with ease and focus on the beautiful, long-term results ahead.
Key Takeaways
- Learn why the first 72 hours are vital for site protection and how prioritizing rest ensures a smooth start to your healing journey.
- Navigate each stage of the dental implant recovery process with a detailed roadmap that helps you manage common post-operative symptoms with ease.
- Understand the science of osseointegration and why allowing three to six months for your implant to fuse with the bone creates a permanent foundation for your smile.
- Master simple lifestyle adjustments, like the “no-straw” rule and specific nutritional choices, to accelerate your body’s natural tissue repair.
- Gain the confidence to distinguish between normal healing and signs that require a quick, reassuring call to your dental team.
The First 72 Hours: Navigating the Critical Early Healing Phase
The first three days are the most important part of your dental implant recovery process. This period is all about protecting the surgical site and allowing your body to begin the incredible biological journey of healing. We believe your comfort should be the top priority from the very start. By utilizing our sedation dentistry options, you can begin this phase in a completely relaxed state. Many of our neighbors find that starting their recovery without stress or anxiety makes the entire experience feel much more manageable and positive.
During these first 72 hours, it’s normal to notice some minor swelling, occasional bruising, or localized tenderness. These aren’t signs of trouble; they’re evidence that your body is working hard to support your new smile. By following a few simple steps at home, you can minimize these symptoms and keep your recovery on the right track. We’re here to guide you through every moment, ensuring you feel supported as you rest and recharge.
Immediate Aftercare Steps for Day One
Biting firmly on the provided gauze for 30 to 60 minutes is the essential first step to successful healing because it applies the consistent pressure needed for a stable blood clot to form. Once the initial clot is set, you can focus on staying comfortable with these practical tips:
- Ice Pack Application: Apply a cold compress to the outside of your face for 20 minutes on and 20 minutes off during the first 24 hours to significantly reduce external swelling.
- Elevation Techniques: Keep your head elevated above your heart, even while resting on the couch or sleeping, to help reduce throbbing and prevent excess pressure at the site.
- Prioritize Rest: Avoid any strenuous physical activity for the first few days to keep your heart rate steady and your healing focused where it matters most.
Pain Management and Oral Hygiene
As the effects of clinical sedation gently wear off, you’ll transition to managing your comfort with recommended over the counter or prescribed measures. Most patients find that staying ahead of any tenderness with regular doses for the first 48 hours keeps them feeling great. Cleanliness is also vital, but you must be gentle to protect the developing Osseointegration process.
The “Salt Water Rule” is your best friend during this stage. Starting 24 hours after your procedure, you can begin gentle rinses to keep the area clean. Mix a half-teaspoon of salt in a glass of warm water and let it bathe the surgical site. It’s vital that you don’t swish aggressively, use straws, or spit forcefully. These actions create suction that can dislodge the healing clot. Instead, let the water roll out of your mouth into the sink to keep everything stable and secure.
The Osseointegration Phase: Understanding Long-Term Stability
Once the initial healing from the first few days settles, your body begins a remarkable quiet phase. This is called osseointegration. It’s the biological process where your jawbone naturally fuses with the titanium post. This creates a foundation as strong as a natural tooth root. While you won’t feel this happening, it is the most critical stage of the dental implant recovery process. It transforms a surgical procedure into a permanent lifestyle upgrade.
Patience is your greatest ally here. For a standard implant, this fusion typically takes between three to six months. Even for advanced procedures like All-on-4 dental implants, we must ensure the bone is perfectly stable before attaching your final, custom-made crown. We call this avoiding “implant overload.” Placing the permanent tooth too early can stress the site and interfere with that vital bond. We wait because we want your new smile to last a lifetime, not just a few years.
Protecting the Integration Process
Your daily habits play a big role in how well your bone accepts the new implant. Factors like smoking or uncontrolled systemic health issues can sometimes hinder bone growth. We use advanced digital imaging during your follow-up visits to monitor your progress with precision. If you’re curious about the specific milestones during this time, reviewing a detailed dental implant recovery timeline can give you extra peace of mind. Our dental implant clinic team is always ready to review these images with you so you can see your progress firsthand.
Red Flags: When to Contact Your Vancouver Dentist
It’s helpful to know the difference between a healing sensation and a concern. Most patients feel very little during this phase as the bone strengthens. However, your long-term health is our priority. If you experience a sudden fever, persistent sharp pain, or a feeling that the implant has shifted, please call us immediately. While the 2026 success rate for these procedures is 97.83%, catching any minor issues early ensures your recovery stays successful. We would much rather see you for a quick, reassuring check-up than have you worry at home. If you’re still in the planning stages and wondering am I a candidate for dental implants, understanding how factors like bone density and overall health affect your eligibility can help you feel even more prepared for a successful outcome.
Lifestyle and Diet: Practical Guidance for a Smooth Recovery
Successful healing is a partnership between our clinical care and your daily choices. While the internal work of osseointegration happens quietly, your lifestyle habits provide the support your body needs to excel. One of the most vital rules to follow is the “no-straw” rule. Suction is the primary enemy of the early dental implant recovery process because it can dislodge the protective blood clot. Instead, sip directly from a cup to keep the surgical area stable and secure.
To accelerate tissue repair, focus on protein and Vitamin C. These nutrients provide the essential building blocks your body needs as it moves through the various dental implant healing stages. By making mindful choices about your activity and nutrition, you ensure that your recovery is as comfortable and efficient as possible.
The Dental Implant Recovery Diet
What you eat directly impacts how quickly your tissues repair themselves. For the first 48 hours, stick to a liquid or ultra-soft diet. Protein shakes, lukewarm soups, and yogurt are excellent choices that provide energy without requiring any chewing. From day 3 through day 14, you can transition to “fork-tender” foods. Think of flaky fish, scrambled eggs, or well-cooked pasta that easily breaks apart. Always avoid seeds, nuts, and crunchy snacks. These small particles can easily lodge in the surgical site and cause unnecessary irritation.
Activity Levels and Rest
Rest is a productive part of your journey. During the first week, we recommend avoiding heavy lifting or intense cardio. These activities increase your blood pressure, which can lead to unwanted throbbing or swelling at the implant site. Your sleep hygiene also matters. Propping yourself up with a few extra pillows helps you wake up with less morning swelling and keeps you feeling refreshed.
As you return to your social life in Vancouver, you’ll find that most daily activities feel normal within just a few days. If you are also using Invisalign to perfect your smile, we will coordinate your treatment plan to ensure your new implant integrates seamlessly with your clear aligners. This thoughtful approach ensures your dental implant recovery process leads to a healthy, beautiful smile you can be proud of for years to come.
Start Your Journey to a Confident New Smile
Navigating the dental implant recovery process is much easier when you have a clear plan and a supportive team by your side. You now understand how the first 72 hours of rest and gentle hygiene set the stage for long term success. By embracing the patient phase of osseointegration and following a supportive diet, you’re ensuring your new smile remains strong for a lifetime. This journey is about more than just a procedure; it’s about reclaiming your health and the freedom to smile without hesitation.
At Padden Dental, we take great pride in being your partner throughout this transformation. Dr. Eric Padden brings over 20 years of experience in Vancouver to provide personalized restorative care that fits your unique needs. If you’ve felt anxious about dental work in the past, our sedation dentistry options are designed to make your experience as relaxing and comfortable as possible. We’re here to answer every question and celebrate every milestone with you.
Ready to take the next step toward a restored smile? Schedule your dental implant consultation with Padden Dental today. We look forward to welcoming you into our office and helping you achieve the healthy, beautiful results you deserve.
Common Questions About Your Healing Journey
How much pain should I expect during the dental implant recovery process?
Most patients are pleasantly surprised to find that the discomfort is quite manageable and often comparable to a simple tooth extraction. You might feel some minor tenderness or a dull ache for the first two to four days, but this is usually well controlled with standard over the counter comfort measures. Our goal is to ensure your dental implant recovery process is as smooth as possible, so we’ll provide specific instructions to keep you feeling relaxed and at ease.
When can I return to work after getting a dental implant in Vancouver?
You can typically return to a desk job or light activities within one to two days after your procedure. If your daily work involves heavy lifting or intense physical exertion, we recommend taking three days off to keep your blood pressure steady and prevent any unnecessary swelling. Many of our neighbors schedule their visit for a Thursday or Friday so they can enjoy a restful weekend before returning to their normal routine on Monday morning.
What happens if my dental implant feels loose during the healing phase?
You should contact our office immediately if you notice any movement or a loose sensation around the surgical site. While 2026 clinical studies show a failure rate of just 2.17%, a loose feeling can sometimes indicate that the bone hasn’t fully bonded with the post. Early intervention allows us to assess the site and take the necessary steps to protect your investment and ensure your long term success.
Can I wear my dentures or flipper during the recovery period?
You can often continue wearing your temporary appliance, though it may require a quick adjustment to ensure it doesn’t put pressure on the healing tissue. We want to make sure your “flipper” or partial denture stays clear of the surgical site so it doesn’t interfere with the stabilization of the implant. If you’re weighing your long-term tooth replacement options, our detailed guide on dental implants vs dentures can help you understand the lasting benefits of each path. We’ll check the fit during your appointment to ensure you feel confident and comfortable while your smile heals.
How do I clean my teeth around the dental implant site?
Continue to brush and floss your natural teeth normally, but avoid touching the surgical site with your toothbrush for the first week. Instead, rely on the gentle warm salt water rinses we discussed to keep the area clean without causing irritation. Once the initial tenderness subsides, you can begin using a soft-bristled brush to very gently clean the area, ensuring you maintain the high standard of hygiene necessary for a healthy restoration.